
Before learning the techniques to root an Android 9.0 Device, let’s start with what happens when your Android device is Rooted? Rooting a Device permits you to eliminate barriers and open control to your Android.
By Rooting, you can control almost every feature of your Device and make your software work as you want it. You are not more dependent on OEMs and their slow support, over-packed features, and uncertain packages.
Why You should Root Your Android 9.0 Device?
Through this function, you can find a way of unlocking the operating system so you can connect un-certified Apps, update your Operating System, exchange the Firmware, remove unnecessary Bloatware, Overclock (or under-clock) the processor customize anything, and many more.
As you know, nowadays, you can’t survive without rooting your mobile phone and getting superuser access to it. This Device makes it easy to break your excessive Mobile Security. Achieving root access also involves in avoiding the security restrictions placed by the Android Operating System.
Methods to Root Your Android 9.0 Device
The Android System has developed and improved better and better, but still, some users prefer to Root their Android System. There are several tricks that can quickly root your Android with Root Apk Software.
1. Root Android 9.0 Device via SuperSU
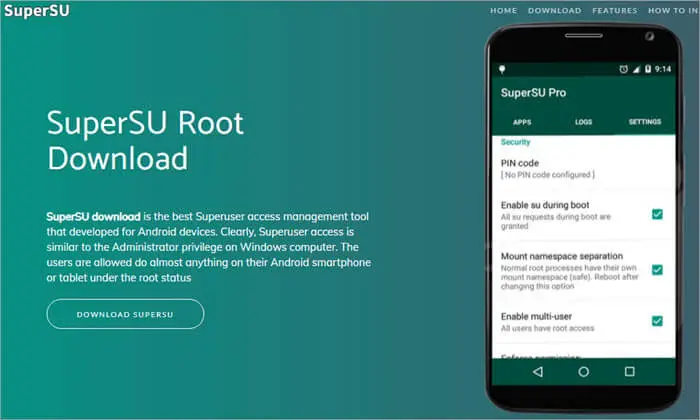
SuperSU must make your rooting go well. Mainly, it keeps excellent control of the Apps and can take access to the primary layers of the Device’s System. So it is all about ensuring security after rooting. Follow the following guide to root your Android Device with SuperSU.
Step 1: First of all, download a SuperSU Zip file from any available software.
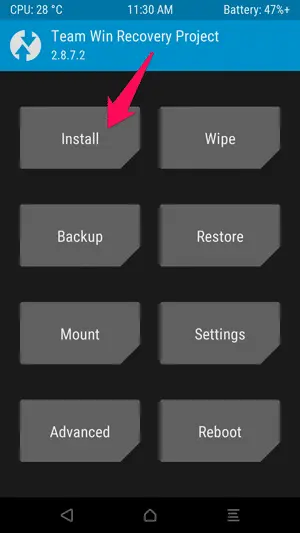
Step 2: Then, it would be best if you had to boot your device into a custom recovery. For this recovery, you may need to install the custom recovery software.
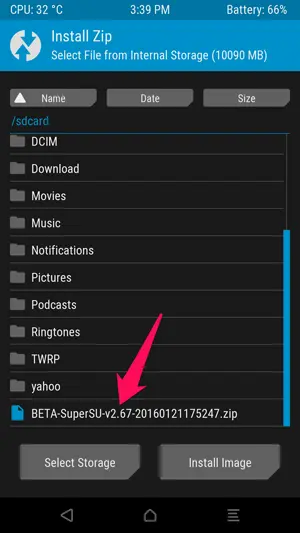
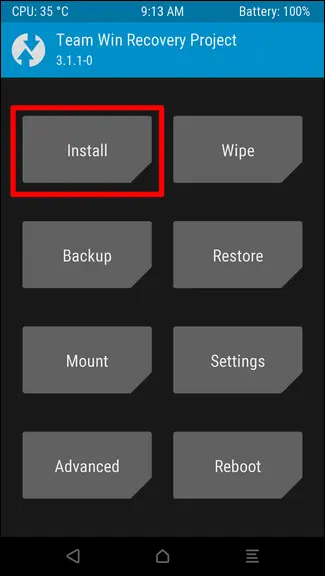
Step 3: From the Recovery Menu, click Install and select the zip file SuperSU that you have downloaded from in Step 1.
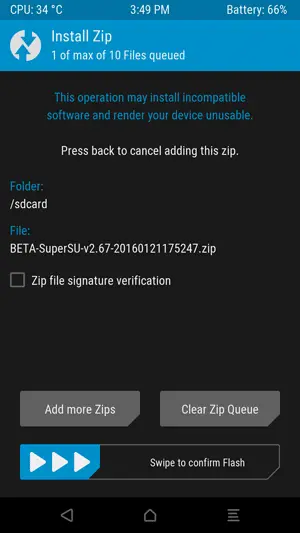
Step 4: After selecting the SuperSU .zip file, Swipe to Authorize Flash on the bottom of the screen to start the flashing process.
Step 5: Finally, When the SuperSU is flashed in your Device, you should have to Reboot the System and Wipe the Dalvik cache. So first, Click on Wipe Dalvik cache and then on Reboot System.
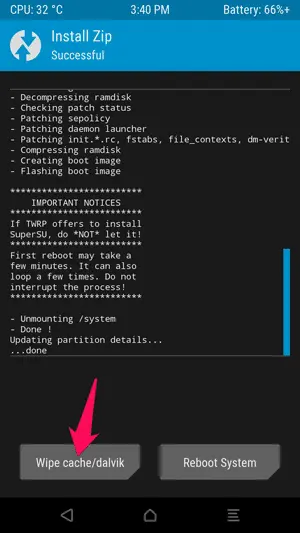
After completing this process, you will finally get full root access to your Android System.
Statics: It has been explored that there are millions of downloads recorded, and 4.3 ratings out of all 5 with more than 496,150 reviews found that it is the most innovative and most accessible approach to keep all superuser access management clean and proper.
2. Root Android 9.0 Device Magisk
Magisk was presented as an alternative to root, and SuperSU was the only rooting solution at that period. It transforms system files to run root access to Android devices. Magisk introduced an easy way of rooting with a less systematic rooting process. It roots the system without transforming the main code. It was a bonus for people who were using Financial Apps on their Android devices.
Magisk is the latest method to root android 9.0 devices. It can be done in the easy and most simple way. Here is the latest strategy for you to root your android device through Megisk. By using the following steps, you will get rooted in your Android Device easily.
Step 1: Start downloading the Magisk Manager and place it in your phone’s storage.
Step 2: After downloading Manager, make sure you boot your Device into custom recovery software. You can take a guide on Google or YouTube for proper instruction on installing a custom recovery for your Android 9.0 Device.
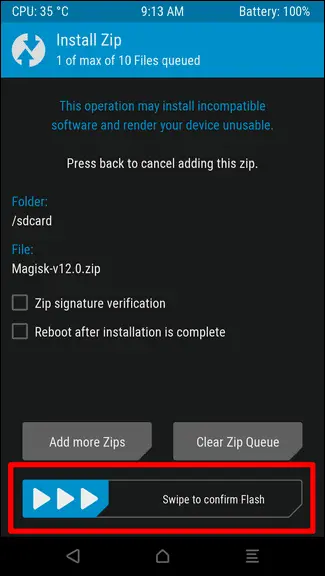
Step 3: Now, click on the Install button and select the Magisk.zip file you transferred to your device storage in Step 1.
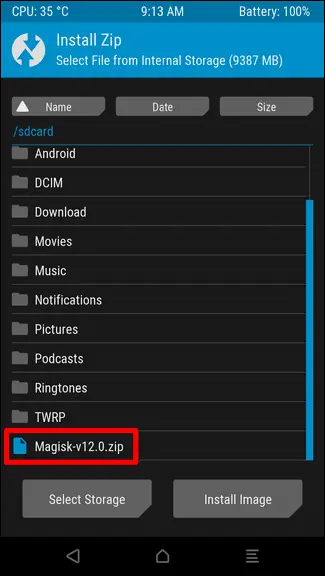
Step 4: When you select the zip file, swipe to confirm Flash on your smartphone screen’s bottom side to start the flashing process.
Step 5: Now, when Once your Magisk is flashed, you’ll receive the Reboot System option here; you should have to select it to reboot your device.
Step 6: After rebooting the Device, open a file manager application and go to the folder where you transmitted the Magisk Manager Apk file in Step 1; now, Install it.

Step 7: After completing all steps, open the Magisk Manager app and check your Device’s root status.
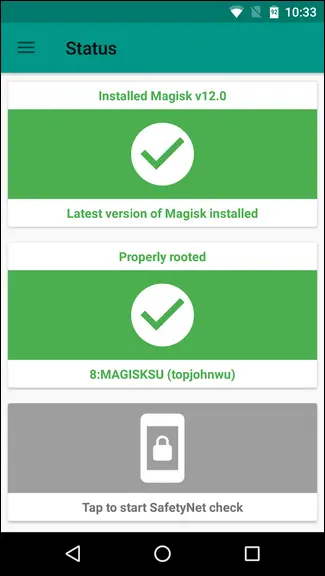
That’s All, and Now you can easily use the features of this rooting apk file and enjoy extraordinary access to your Device.
Additional Statistics
| Software Name | Magisk |
| Last Updated | May 12, 2021 |
| Android Version Requires | 5.0+ |
| Total Downloads | 50,000,000+ |
| App Size | 7.11 MB |
| Developer | Topjohnwu |
| Main Task | Magisk Hides Roots from Banking Applications. |
3. Root Android 9.0 Device via KingoRoot

KingoRoot for Android is the most beneficial and authoritative apk root tool. You can root any Android Device and version without connecting to a PC. It is developed in apk file format. It provides you access to Free download and install it on your Android Device. Now install it by using the following steps.
Step 1: Select the option, Free download KingoRoot APK. The download will be automatically started to your Device. Go to “Download” on your Android phone and get it. If Chrome has notified you about KingoRoot.apk, and click OK to proceed.
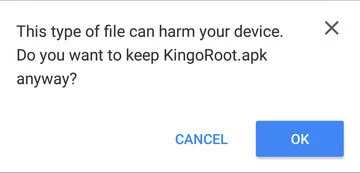
Step 2: Install the KingoRoot APK and keep your device powered on and also enough battery level. When APK download is completed, install the apk file.
Note: If you receive this Install block message. Follow these steps:
- Install Blocked: Settings > Security > Unknown sources > Check the box and allow.

- Harmful App: Settings > Security > Verify apps > Uncheck it
KingoRoot is an exploit-based root tool. It abuses system susceptibilities so that your device can be rooted, which Google or Manufacturers will consider as a spiteful act.
Step 3: First, make sure that your network is stable, and then click “One Click Root.” Finally, the KingoRoot APK is successfully installed on your device. You can start to use it.